
Table of Contents
Introduction
Who doesn’t love a quick, creamy, and utterly indulgent dessert? This 3 Ingredient Peanut Butter Fudge is a dream come true for busy home cooks, beginners, or anyone craving something sweet without the hassle. Made with pantry staples, this recipe comes together in minutes and is perfect for gifting, potlucks, or just treating yourself. Whether it’s the holiday season or a casual weekday, this is a foolproof dessert that’ll leave everyone asking for seconds.
Expert Tips for the Creamiest 3 Ingredient Peanut Butter Fudge
Achieving the perfect 3 ingredient peanut butter fudge requires attention to detail and some insider tricks to make the process smooth and foolproof. Follow these tips to ensure your fudge turns out creamy, flavorful, and irresistible every time.
- Measure Accurately: This recipe relies on precise measurements to set properly. Always use measuring cups and level off ingredients for accuracy. The consistency of the texture can be influenced by using an excessive or insufficient amount of powdered sugar.
- Use Sifted Powdered Sugar: Sifting powdered sugar before mixing eliminates lumps and ensures a silky-smooth consistency in your fudge. Skipping this step might lead to a grainy texture.
- Microwave with Caution: When melting butter and peanut butter, heat in short intervals of 30–60 seconds and stir in between. This prevents overheating, which can alter the flavor and consistency.
- Room Temperature Ingredients: Allow butter and peanut butter to come to room temperature before microwaving. This ensures even melting and avoids scorching.
- Prepare Your Pan Properly: Cover the base of your baking dish with parchment paper or aluminum foil, ensuring the edges extend beyond the pan. This extra material will allow you to easily remove the fudge once it has solidified. Lightly grease the lining for effortless removal.
- Achieve a Smooth Top: After pouring the fudge into the pan, utilize the rounded side of a tablespoon or a flat icing knife to create an even and level surface. For a level finish, gently tap the pan on the countertop.
- Chill Correctly: Refrigerate the fudge for at least 2 hours for it to set completely. Avoid rushing by using the freezer, as it can lead to uneven texture or crystallization.
- Cut Clean Squares: Use a sharp knife to cut the fudge into squares. For best results, clean the knife with a warm, damp cloth between cuts to prevent sticking.
- Storage for Freshness: Store fudge in an airtight container to retain its creamy texture. Layer parchment paper between pieces to prevent them from sticking together.
- Experiment with Add-Ins: While the base recipe is simple, adding nuts, sprinkles, or chocolate chips can enhance texture and flavor without complicating the process.
Easy Recipe Variations: Customize Your Peanut Butter Fudge
To make this 3 ingredient peanut butter fudge even more versatile, here are detailed variations and substitutions that cater to different dietary needs, flavor preferences, and texture enhancements. These adjustments ensure that this 3 ingredient peanut butter fudge can be enjoyed by everyone while still delivering that creamy, melt-in-your-mouth texture.
Dietary-Friendly Variations
- Dairy-Free Peanut Butter Fudge: Replace unsalted butter with a plant-based alternative like coconut oil, vegan butter, or margarine. Ensure the substitute is solid at room temperature to maintain the fudge’s structure. Use dairy-free powdered sugar to make the 3 ingredient peanut butter fudge completely vegan.
- Nut-Free Peanut Butter Fudge: For a nut-free alternative that’s equally smooth and tasty, replace regular peanut butter with butter made from sunflower seeds or soy nuts. If nut allergies are a concern, verify that your substitute is processed in a nut-free facility.
- Low-Sugar or Keto-Friendly Fudge: Replace powdered sugar with powdered erythritol or a keto-approved sugar substitute. This keeps the recipe low-carb while maintaining its creamy consistency. Opt for no-sugar-added peanut butter to further reduce sugar content.
- Gluten-Free Peanut Butter Fudge: This 3 ingredient peanut butter fudge is naturally gluten-free. However, double-check ingredient labels to ensure no cross-contamination, especially with powdered sugar or butter alternatives.
Substitutions for Common Allergies or Preferences
- Peanut Butter Alternatives:
- Almond Butter: Offers a slightly nuttier flavor that pairs wonderfully with sweet treats.
- Cashew Butter: Provides a creamy, mild taste that complements the sweetness of fudge.
- Tahini: A sesame seed butter that delivers a unique, slightly earthy flavor.
- Butter Substitutes:
- Coconut oil works as a dairy-free alternative and adds a subtle tropical flavor.
- Vegan butter or margarine is perfect for those avoiding animal products.
- Powdered Sugar Alternatives:
- Blend granulated sugar in a high-speed blender to create a powdered sugar alternative.
- For healthier options, use powdered coconut sugar or monk fruit sweetener for natural sweetness.
Texture Enhancements
- Crunchy Additions: Fold in ½ cup of chopped nuts, such as almonds, pecans, or other nuts, for added crunch. Mix in ½ cup of crushed pretzels for a sweet-and-salty texture contrast.
- Gooey Add-Ins: Swirl in ½ cup of marshmallow fluff for a soft, gooey texture. Add mini marshmallows to create a rocky road-style fudge.
- Layered Fudge: Make a two-layer fudge by preparing a separate chocolate layer using melted chocolate chips and heavy cream. Pour the chocolate mixture on top of the peanut butter fudge before chilling.
Festive and Seasonal Themes
- Holiday Fudge: Add red and green sprinkles or edible glitter to the top for Christmas. Use pastel-colored sprinkles for Easter, or black and orange for Halloween.
- Birthday Celebration Fudge: Top the fudge with rainbow sprinkles to make it birthday-party ready. For an elegant finishing touch, lightly pour melted white chocolate and adorn with edible pearl decorations.
- Valentine’s Day Treat: Incorporate heart-shaped candy pieces or pink and red sprinkles for a romantic touch. Use raspberry or strawberry-flavored extract for a fruity flavor twist.
Best Ways to Store and Preserve Peanut Butter Fudge
- Reheating for Texture: If the fudge has been refrigerated or frozen, allow it to sit at room temperature for 10-15 minutes to regain its soft, melt-in-your-mouth texture.
- At Room Temperature: Keep the fudge in a sealed container at ambient temperature for a maximum of seven days. Keep it in a cool, dry place to maintain its creamy texture.
- Refrigeration: For longer storage, refrigerate the fudge. Separate the pieces using parchment paper to avoid them sticking together. Stored this way, it will last up to 2 weeks.
- Freezing: To store in the freezer, individually encase each portion in wax paper or plastic wrap before placing them in a container suitable for freezing. The fudge can be stored for up to 3 months. Thaw in the refrigerator or at room temperature before serving.
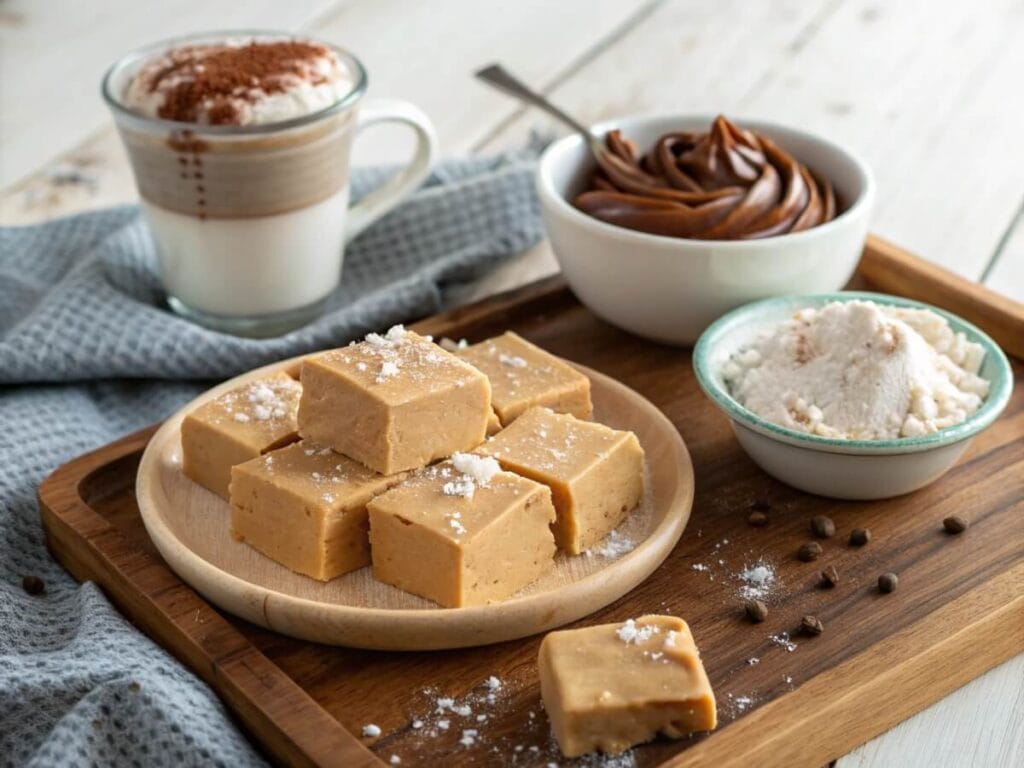
What to Serve with Peanut Butter Fudge: Perfect Pairings
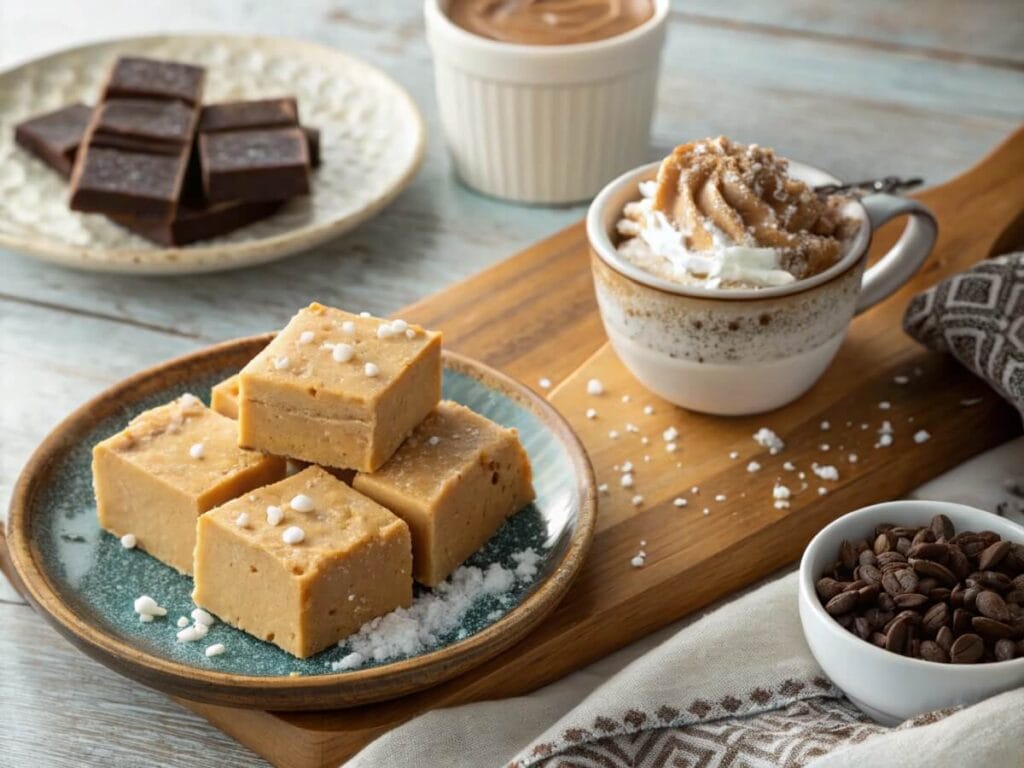
- Drinks: Pair with a hot cup of cocoa, chai latte, or freshly brewed coffee for a cozy afternoon treat. For summer, serve alongside iced coffee or milkshakes to balance the sweetness.
- Dessert Combos: Combine with oatmeal cookies or brownies for a decadent dessert platter. Serve over vanilla ice cream as a topping for a creamy indulgence.
- Savory Counterparts: Offer alongside a cheese and cracker board to balance sweet and savory flavors during gatherings. Include in a dessert charcuterie board for variety.
FAQs: Troubleshooting and Tips for the Best Fudge
- Can I make this recipe dairy-free?
Yes, replace unsalted butter with a plant-based alternative such as coconut oil or vegan butter. Ensure the substitute is solid at room temperature to maintain the fudge’s structure. - How do I prevent my fudge from being grainy?
Graininess can occur if powdered sugar isn’t sifted before mixing. Always sift the powdered sugar and mix the fudge until smooth to avoid this issue. - Can I double the 3 ingredient peanut butter fudge ?
Absolutely! This recipe doubles well. Use a larger pan (e.g., 9×13 inches) and adjust chilling time to ensure the fudge sets completely. - Can I make this on the stovetop instead of using a microwave?
Yes, in a saucepan over medium-low heat, combine the butter and peanut butter. Continuously stir the mixture to prevent it from scorching as it melts. Once melted, remove from heat and mix thoroughly in powdered sugar. - What add-ins work best with this 3 ingredient peanut butter fudge ?
Popular add-ins include chopped nuts (e.g., almonds, pecans), mini chocolate chips, or shredded coconut. For a festive touch, top with sprinkles or drizzle with melted chocolate. - How can I make this fudge look more festive for special occasions?
Decorate the top with themed sprinkles, candy pieces, or edible glitter. For holidays, use seasonal colors (e.g., red and green for Christmas, pastels for Easter).

The Best 3 Ingredient Peanut Butter Fudge
Ingredients
- 1 cup Unsalted butter
- 1 cup Creamy peanut butter
- 3 cups Powdered sugar (sifted)
Instructions
- Prepare Your Workspace: Begin by lining an 8×8-inch baking pan with parchment paper or aluminum foil. Leave enough overhang on the edges for easy removal later. Spray the lined pan lightly with non-stick cooking spray to prevent sticking.
- Combine Butter and Peanut Butter: In a large microwave-safe bowl, place 1 cup of unsalted butter and 1 cup of creamy peanut butter. Microwave the mixture for 1 minute. Remove, stir thoroughly, and return to the microwave for an additional 30 seconds if needed. Ensure the mixture is completely melted and smooth before proceeding.
- Incorporate the Powdered Sugar: Gradually sift in 3 cups of powdered sugar to avoid lumps. Stir with a sturdy spatula or use a hand mixer on low speed. Blend the ingredients together until the confectioner's sugar is completely combined, resulting in a fudge mixture with a silky and shiny texture.
- Transfer to the Pan: Pour the mixture into your prepared baking pan. Use a spatula to spread it evenly, pressing it gently into all corners. Smooth the top for a polished finish.
- Chill the Fudge: Place the pan in the refrigerator and let it chill for at least 2 hours or until the fudge is firm to the touch. For quicker results, you can freeze it for about 1 hour.
- Cut and Serve: Once the fudge has set, using the parchment paper's extended edges, carefully remove it from the pan. Using a sharp blade, divide the item into square pieces measuring approximately 1-inch on each side. Serve immediately or store for later.
Notes
- Calories per serving: Approximately 190 calories per 1-inch square.
- Difficulty: Easy
- Dietary Tags: Gluten-Free, Vegetarian
- Nutritional Info per serving: 9g fat, 6g saturated fat, 15g carbs, 1g fiber, 3g protein, 30mg sodium
Make This 3 Ingredient Peanut Butter Fudge Today!
This recipe is the epitome of simplicity and indulgence. Whether you’re a seasoned baker or a beginner, this 3 ingredient peanut butter fudge guarantees success with minimal effort. It’s perfect for holidays, potlucks, or satisfying a sweet tooth in record time. Plus, with so many variations and substitutions, you can tailor this homemade fudge to fit any occasion or dietary need.
Take a moment to whip up this creamy, rich dessert and enjoy the compliments that follow. Do not hesitate to share your creations on social media using #SimplePrepRecipes. Your feedback and creativity inspire us, so let us know how you made this sweet treats recipe uniquely yours!
Get started today and experience the joy of making the best 3 ingredient peanut butter fudge that’s bound to become a household favorite.
Explore More Gluten-Free Recipes
Explore a delightful array of recipes tailored to your taste. From cherished classics to new favorites, there’s something for every occasion: